
How to Tile Walls in Shower Like a Pro
If you’re looking to tile your bathroom shower walls like a pro, look no further! In this blog post, we will walk you through the steps necessary to do just that. We’ll provide tips on choosing the right tile, installing it correctly, and making sure it looks great for years to come. So whether you’re a beginner or a seasoned pro, read on for the best tips on how to tile walls in shower!
Choosing the Proper Tile
Are you hoping to give your bathroom a makeover? If so, one of the first things you’ll need to do is select the right tile. There are many factors to consider, including style, durability, and cost. Fortunately, Standard Tile has a wide selection of options to choose from. When it comes to style, you can go for a classic look or opt for something more modern. If durability is a concern, you’ll want to look for tile that is resistant to moisture and scratches. And of course, cost is always a factor. At Standard Tile, you’ll be able to find tile that fits both your budget and your vision.
Remove the existing tile walls of your shower.
The first step in tiling a shower is to set up your workstation.
- If you are building a whole new bathroom, be sure to check for permitting you may need from your local permits department.
- Remove all of the shower equipment and hardware. If at all feasible, leave the shower pan in place to avoid any harm.
- Remove the tile and backer board down to the studs with heavy-duty work gloves on. If necessary, use a hammer, chisel, and prybar. If you discover a metal mesh layer behind the backer board, use wire cutters.
- To prevent harm or accidental damage, remove the tile shower wall in tiny sections.
- This is also a good time to remove any popcorn ceiling so you do not risk making a mess later on your new shower tile.
- Remove the demo debris and, using a shop vac, vacuum up the remaining tile and mortar dust.
Prepare the Walls
- Before installing the cement backer board, install a 4-mil plastic vapor barrier above the shower pan as directed by the manufacturer.
- Measure your cement backer board panels to match the shower walls on each side. Put on a mask and ear protection, and use an angle grinder to mark and cut a panel to fit. Clean up the rough edge.
- When it comes to shower stalls, the width is usually shorter than the length. Begin by measuring the distance from one wall to the other. Fasten each panel to studs with 1 1/4-inch drywall screws. Install screws every 4 inches along seams and every 6 inches along non-seams, leaving a 1/8-inch space between each panel. Continue measuring forward from there until you get to the rear of the shower stall.
- Make sure the cement board is flush with the ceramic base’s tile edge. If necessary, use composite shims fastened to the studs behind the board to ensure a proper fit.
- Cut out the holes in the backer board where the new fixtures will be put at the front width of the shower stall with a hole saw, then fasten to the studs.
- 100% silicone tile caulk should be used to seal the space between the panels.
- Overlay a strip of fiberglass mesh tape over every joint and corner. Staple the mesh tape into place, then smooth over with a thin-set mortar application that’s as flat and even as possible to avoid accumulation.
- The gap between the wallboard and the cement backer’s edge will most likely be larger. To close off the space, apply seam tape and thin-set mortar to both sides. There should be no sign of a gap between the two elements.
- Allow for at least 24 hours between applications of water-proofing membrane paint, allowing each layer to dry fully before adding another.
- Use a second coat of silicone caulk to fill in any minor gaps.
Line Up the Start Point
- Start with the second row up from the bottom and work your way up. If the shower floor is uneven, tiles will need to be cut to fit the final row.
- Use a level to draw a line where the bottom of the second row will fall.
- Attach a straight board to the backer board along the line. The tile will follow this straight edge while it dries, allowing it to be supported and preventing warping.
Mix Up a Thin-Set Mortar
- Mix Thin-Set mortar following the directions on the package.
- Use a paddle bit attachment on a drill to combine the mortar in a pail. Allow to cure for seven minutes, then repeat the process. The texture of the final mixture should be that of peanut butter.
- Don’t waste time mixing Thin-Set mortar by hand. Remove a little at a time, then reseal the container.
- For each row of tiles you’re tiling, only use or remove enough thin-set until it’s the right amount. Allow the thin-set to dry before putting it on or else the tile grip won’t be adequate.
Complete the first row of tiles
- Run a damp sponge over the backer board in the area you want to tile.
- Cover the bottom of your tile with a thin layer of Tile & Grout Shield before tiling.
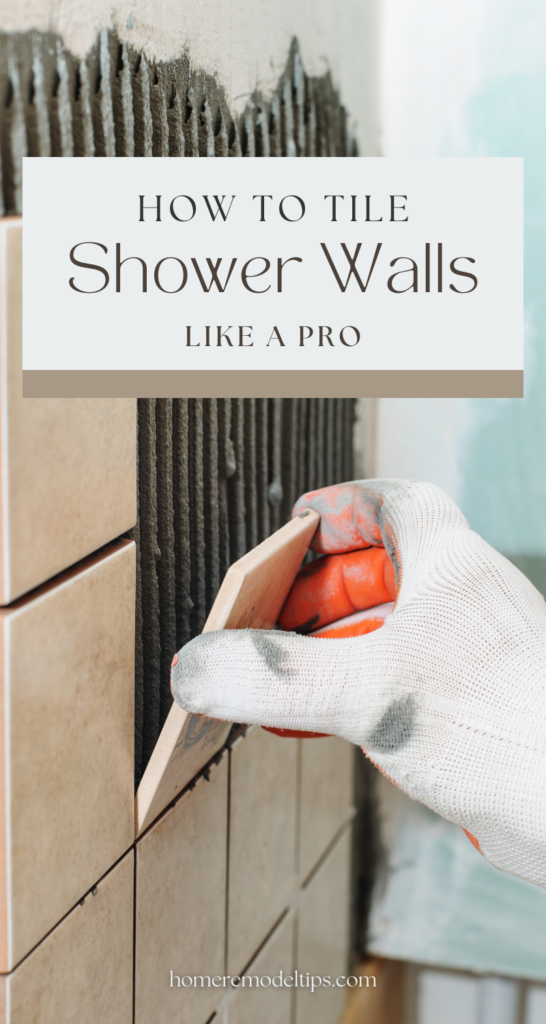
- Turn the trowel over to the notched side and comb in one direction.
- Backfill with a little more mortar, and then spread it out over the back of a tile using the notched side of your trowel. You may omit this step if you’re using tiny tiles.
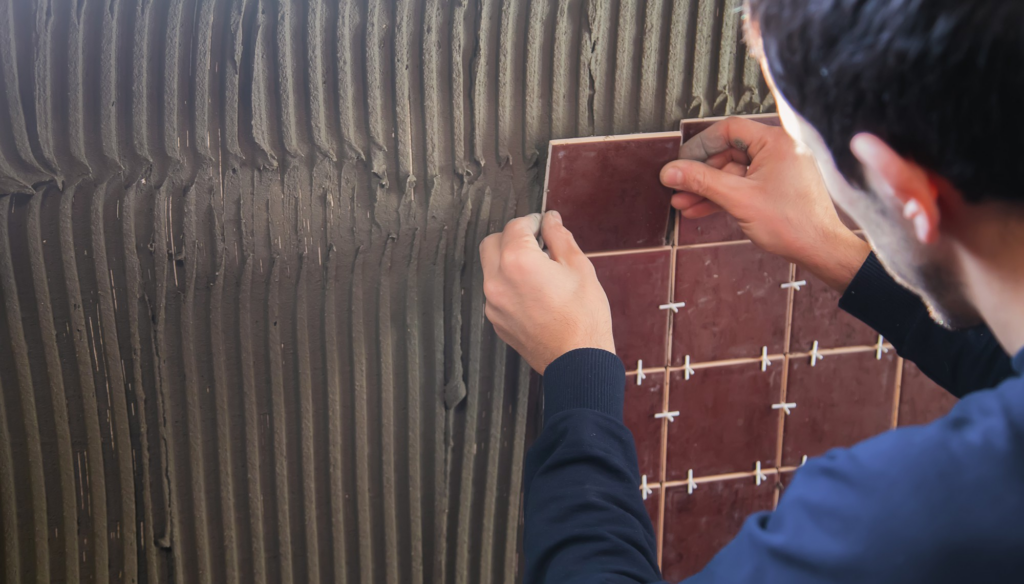
- Repeat the previous step on all of the tiles. After that, press each tile firmly yet gently into the mortar aligned along your board guide. Gently wiggle it to help it settle into the mortar.
- After that, insert a tile spacer between each section of tile.
- When you reach the corner, make a note of it and cut the tile to fit into the last space. Continue adding tiles to the row until it’s complete. Make a note of and cut the tile at the corner to match up with.
- Allow the first row to dry and cure for 24 hours. This will aid in the stability of future rows.
Complete the Rest of the Tile
- Place a new tile above the current row and continue following the steps. To allow tile pieces to fit around shower faucets and shower heads better, use tile snips or a wet tile saw as needed.
- To be sure the tile line is straight, check it with a level every now and then.
- Set the exposed edges or bullnose tile pieces in place if they’re not already there.
- Remove the support board when only the bottom row is left.
- Tiles should be cut to fit the lower row, using a tile saw (if available). Avoid having the bottom of the tile sit flat against the bottom edge of the cement board. On each tile, leave about a half-inch overlap.
Grout the Tile
- Remove the tile spacers after 24 hours, when the bathroom tile has cured and set.
- Make your own grout by mixing the desired color according to the manufacturer’s specifications.
- Apply grout in small areas at a time, using a runner float. Work the compound into the joints by dragging the float diagonally.
- Allow 10 minutes for the compound to dry before wiping away any excess with a wet sponge, taking care not to wipe it out of the joints.
- Grout finishing involves completing the grout in sections, working your way up.
- Allow the grout to dry before removing the hazy film from the tiles with a haze remover.
- After three days, apply silicone to the shower’s corners, edges, and floor joints.
Tiling your bathroom shower is a great way to add value to your home. By following these simple tips, you can know how to tile walls in shower.


5 Replies to “How to Tile Walls in Shower”